A Buyer’s Checklist: How to Select the Right Spa Covers

0 Comments

A Buyer’s Checklist: How to Select the Right Spa Covers

Choosing the right spa covers is a decision that impacts your spa’s performance, longevity, and daily convenience. A quality cover helps retain heat, block out debris, and prevent energy loss—making it essential for any hot tub owner.

With many options on the market, knowing what to look for simplifies the selection process. Use this practical checklist to compare features and find the ideal spa cover for your specific needs and environment.

1. Measure Your Spa Dimensions Accurately

Before browsing options, it’s important to get precise measurements of your spa. Covers that are too tight or too loose can cause poor insulation, water loss, and uneven wear.

What to measure:

  • Length and width of the spa
  • Radius of rounded corners (if applicable)
  • Distance between cover seams and control panel
  • Skirt length (the flap that hangs over the edge)

Custom-fit spa covers are available for non-standard shapes like round, octagonal, or kidney-shaped spas.

2. Choose the Right Material for Durability

Spa covers must withstand constant exposure to sunlight, moisture, and varying temperatures. The outer shell material largely determines how well a cover holds up over time.

Material options:

  • Marine-grade vinyl: Most common, water-resistant, and UV-protected
  • PVC-coated polyester: Lightweight and breathable
  • Weather-treated fabric: Used in milder climates or seasonal use

The thicker and denser the material, the longer the cover will last. Look for UV inhibitors, mildew resistance, and double-stitched seams for added durability.

3. Evaluate Insulation for Energy Efficiency

Heat retention is a top priority for spa owners. A well-insulated cover reduces energy costs by keeping water warm and limiting heater usage.

Insulation features to compare:

FeatureBenefit
Foam Core Thickness4″-2″ tapered design retains heat better
R-ValueRating of 12+ is optimal for cold climates
Heat-Sealed Vapor BarrierPrevents moisture absorption
Full Hinge SealBlocks heat from escaping at fold

Insulated spa covers are especially valuable in colder regions or for spas that are used frequently.

4. Check the Safety Features

Spa safety is a key concern, particularly for families with children or pets. Covers with built-in safety mechanisms not only protect users but also help meet insurance or regulatory requirements.

Look for:

  • Locking tie-down straps
  • Child-resistant buckles
  • Reinforced handles for secure removal
  • ASTM-certified safety compliance

These elements provide peace of mind and ensure your spa remains off-limits when not in use.

5. Match the Cover to Your Local Climate

Spa covers need to perform differently based on your regional weather. What works in the desert won’t suit snowy areas.

Climate-Specific Suggestions:

Climate TypeIdeal Features
Cold & SnowyThick foam core, reinforced seams, sloped design
Sunny & HotUV-resistant vinyl, breathable layers
Rainy & HumidMold-proof lining, sealed stitching
Windy RegionsLocking hardware, secure anchoring straps

Matching the cover to your environment extends its lifespan and improves spa performance.

6. Consider Ease of Use

Frequent spa users benefit from a cover that’s easy to remove and replace. Heavier models may require two people or a mechanical lifter, while lightweight or split designs offer more convenience.

Convenience features:

  • Cover lifters (manual or hydraulic)
  • Lightweight foam options
  • Foldable designs for one-person handling
  • Grippy, ergonomic handles

For large spas, an automatic cover lifter system may be worth the investment.

7. Don’t Overlook Aesthetic Appeal

Spa covers contribute to your backyard’s overall look. With a variety of color and texture choices available, you can match the cover to your patio furniture, deck, or spa cabinet.

Style options:

  • Earth tones (sand, cocoa, charcoal)
  • Custom logos or monogram embroidery
  • Leather-like textures or matte finishes
  • Skirt length adjustments for seamless integration

Some manufacturers also offer color customization or printed designs to blend with your outdoor decor.

8. Understand Warranty and Replacement Terms

Finally, a quality spa cover should come with a warranty that reflects its expected performance. Always read the warranty details to understand what’s covered and for how long.

Typical coverage includes:

  • Vinyl cracking or fading
  • Foam core waterlogging
  • Defective stitching or hardware
  • Structural sagging under normal conditions

Most reputable spa cover warranties last between 2 to 5 years, depending on materials and usage.
Custom Hot Tub Covers That Fit Perfectly and Last Longer

0 Comments

Custom Hot Tub Covers That Fit Perfectly and Last Longer

Precision Fit for Maximum Protection

Custom hot tub covers are crafted to match the exact dimensions and shape of your spa. This precise fit ensures complete coverage, eliminating gaps where heat escapes or debris enters. Unlike one-size-fits-all models, custom covers follow the contours of your tub—round, square, octagonal, or irregular.

This tailored seal reduces exposure to external elements and improves energy retention. It also provides better coverage over raised or built-in spa components, making maintenance easier and reducing water contamination.

Durability Starts With Material Quality

A key reason why custom hot tub covers last longer lies in the materials used. Most are constructed using marine-grade vinyl—resistant to UV rays, moisture, mildew, and extreme temperatures. The interior core typically features high-density closed-cell foam, offering both insulation and structural strength.

Additional layers such as vapor barriers, heat-sealed seams, and double-stitched edges prevent early wear and extend the life of the cover. Reinforced corners and handles make daily use safer and reduce tearing over time.

Energy Efficiency You Can Count On

Well-insulated hot tub covers lower energy costs by preventing heat loss. When the cover is custom-fit, the insulation works even more effectively. With less warm air escaping, the spa heater cycles on less frequently—cutting down on electricity usage.

Covers with higher R-values provide enhanced thermal performance. Some models even include heat-reflective surfaces to further improve retention. In colder climates, these energy savings can be substantial throughout the year.

Custom Options for All Shapes and Sizes

Spa owners aren’t limited by design when selecting a custom cover. Whether the hot tub is sunk into a deck, free-standing, or features raised seating and jets, custom hot tub covers can be fabricated to accommodate every nuance.

Popular customizations include:

  • Cutouts for water features or control panels
  • Varying foam thickness for added support
  • Rounded or square corners
  • Split covers for larger spas
  • Overhangs for better sealing

These adjustments ensure the cover functions properly without disrupting your spa’s unique layout.

Protecting Against the Elements

Outdoor spas are constantly exposed to environmental wear. From sun to snow, wind to rain, hot tub covers must perform year-round. Custom models are made to withstand these conditions without warping, sagging, or fading.

UV inhibitors built into the vinyl shield against sun damage. Tapered designs allow water and snow to run off instead of pooling. Interior vapor seals keep moisture from soaking into the foam core, preventing bacteria and mold.

For snowy regions, reinforced cores and double stitching provide the strength needed to carry heavy loads without buckling.

Safety Built Into Every Design

Hot tub covers contribute to home safety, especially when custom-fitted. With secure locking straps, these covers stay in place—even in high winds—and prevent unauthorized access. This is particularly useful for families with small children or pets.

Custom-fit also means better sealing at edges and corners, which helps prevent accidental slips or exposure to untreated water. Safety handles and textured finishes add extra grip for lifting and replacing the cover.

Color and Texture Choices to Match Your Outdoor Style

Today’s hot tub covers aren’t just functional—they’re designed to look great too. Custom covers come in a wide range of color options to coordinate with patio furniture, decking, or home exteriors. From natural earth tones to sleek charcoal grays, there’s a style to complement every outdoor setup.

Some vinyl covers offer textured or leather-like finishes that enhance the overall aesthetic. The result is a cover that doesn’t just protect your investment, but also elevates your space.

Ease of Use and Everyday Convenience

Custom covers aren’t just about fit—they’re about convenience. With lightweight core materials, balanced design, and optional cover lifters, daily removal and replacement become quick and easy.

Built-in handles, corner tie-downs, and weather flaps make the cover user-friendly even during colder months. Split designs or hinge folds allow larger covers to be maneuvered without requiring multiple people.

Optional cover lifters or lifting arms can be added to simplify usage further, especially for those with limited mobility or who use their spa frequently.

Extended Lifespan With Proper Maintenance

Custom hot tub covers are built to last, but simple care practices make a big difference. Regular cleaning with mild soap and water removes grime, while occasional vinyl protectant helps maintain the surface against cracking and fading.

Store the cover flat when off the tub, and avoid sitting or stacking heavy items on top. Ensure snow or pooled rainwater is removed quickly to reduce strain. With these habits, many custom covers last 5–7 years or more—well beyond the average off-the-shelf model.

How Do I Know If My Gas Line Is Leaking Underground? A Guide for Warragul Homeowners

0 Comments
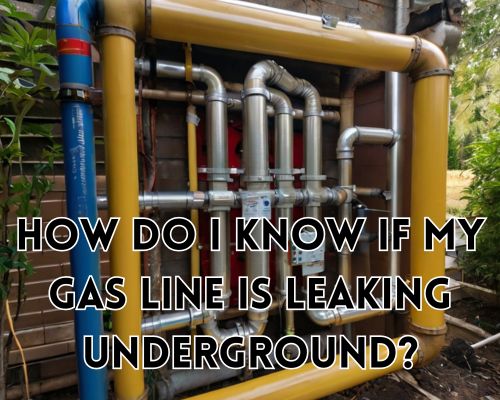
Steel gas pipes running across a rugged landscape

How Do I Know If My Gas Line Is Leaking Underground? A Guide for Warragul Homeowners

Gas leaks can be a serious safety issue for homeowners, especially if the gas line is buried underground. If you live in Warragul, Australia, and are wondering how to detect a potential gas line leak on your property, it’s crucial to act quickly. Gas line leaks not only pose health risks but can also lead to property damage or even explosions if not identified and addressed in time. With Dean Owens of Plumber Warragul, we’ll explore how to spot underground gas line leaks and what steps to take to ensure your home’s safety.

Steel gas pipes running across a rugged landscape

Understanding Gas Line Leaks

Gas lines, especially underground ones, carry natural gas to your home for heating, cooking, and hot water systems. Over time, these pipes can corrode, crack, or suffer damage from various factors like tree roots, shifting soil, or even external construction. In Warragul, where properties vary in age and infrastructure, old gas lines might be more susceptible to leaks.

Underground gas leaks can be tricky to detect because they are not always visible on the surface. However, by paying attention to certain signs and taking preventive steps, you can identify a leak early before it escalates into a more significant problem.

Key Signs of an Underground Gas Leak

  1. Unusual Smell
    Natural gas is odorless, but utility companies like AGL Energy and Origin Energy add a distinctive sulfuric smell to it, often compared to rotten eggs. If you notice this odor near your lawn, driveway, or garden in Warragul, it may indicate that a gas leak is occurring beneath the ground. This smell, combined with a persistent odor even after ventilating the area, suggests a more serious issue.
  2. Dead or Dying Vegetation
    One of the first signs of an underground gas leak is the death of plants or grass. Gas can leak from an underground pipe and disrupt the oxygen supply in the soil, preventing plants from absorbing the nutrients they need. If you observe a patch of your yard in Warragul where the grass is suddenly dead, while the surrounding plants remain healthy, a gas leak could be the culprit. Check for other unusual symptoms, like wilting flowers or shrubs, in the same area.
  3. Hissing or Whistling Sounds
    If the gas leak is substantial enough, you may hear a hissing or whistling sound near the suspected leak area. This sound is often a result of gas escaping through a crack or hole in the pipeline. While underground leaks may not always produce a loud noise, a persistent hissing sound near where you suspect a leak could indicate a more severe issue. If you hear anything unusual, don’t hesitate to contact a professional.
  4. Bubbling or Damp Areas
    A bubbling or damp patch in the soil, especially after rain, could be a sign of an underground gas leak. Gas rising from a leaking pipe can cause the soil to become wet and, in some cases, may lead to the formation of small bubbles. If you notice this in your Warragul yard, it’s important to have the area inspected by a licensed gas plumber as soon as possible.
  5. Increased Gas Bills
    If your gas bill has spiked without any increase in usage, it could be an indication that gas is escaping from your underground line. Monitor your gas consumption regularly and compare it to previous months. A sudden increase, coupled with any of the above signs, might suggest a leak that needs immediate attention.

For professional needs, just visit https://plumberwarragul.com.au/.

What to Do If You Suspect a Gas Line Leak

If you notice any of the signs mentioned above, take immediate action. Here’s a step-by-step guide for Warragul residents to ensure their safety:

  1. Evacuate the Area
    If you detect the smell of gas or hear hissing sounds, evacuate the area immediately. Avoid using electrical devices, light switches, or anything that could create a spark. A spark could ignite the gas, causing an explosion or fire. Ensure all family members and pets are safely away from the potential leak area.
  2. Turn Off the Gas Supply
    If it’s safe to do so, locate the gas meter outside your property and turn off the gas supply. This will help stop the flow of gas and prevent further leakage. However, do not attempt to repair the leak yourself.
  3. Contact a Professional
    In Warragul, call a licensed gas plumber or a gas leak detection service. Professionals have the right equipment and expertise to locate and fix underground gas line leaks. They use advanced technology, such as gas detectors, to pinpoint the source of the leak accurately. Don’t attempt to fix the issue yourself as this could lead to further damage or injury.
  4. Notify Your Gas Provider
    Once you’ve contacted a professional, inform your gas provider about the issue. Companies like AGL or Origin Energy can help with troubleshooting and offer emergency services to mitigate the risk of an explosion or further damage.
  5. Get Your Gas Lines Inspected Regularly
    Preventive maintenance is the key to avoiding unexpected leaks. In Warragul, it’s recommended to have your gas lines inspected at least once every few years, particularly if your property is older. Regular inspections can help detect potential issues early, saving you time and money on repairs and ensuring the safety of your home and family.

Why Gas Leaks Happen in Warragul

Several factors contribute to gas leaks in Warragul. For instance, the area’s proximity to agricultural zones means that tree roots are a common cause of pipe damage. Similarly, soil erosion or shifting grounds due to wet weather can compromise the integrity of underground pipelines. Additionally, older properties in Warragul may have outdated gas lines, which are more likely to corrode or break.

With the changing weather conditions, particularly during the winter and rainy months, the risk of underground gas leaks can increase. The damp soil can cause pipes to rust or weaken, resulting in leaks.

Conclusion: Protect Your Home from Gas Line Leaks

Understanding how to spot the signs of a gas line leak and knowing what to do can help prevent dangerous situations. In Warragul, homeowners should stay vigilant and aware of the risks posed by underground gas lines. If you suspect a gas leak, don’t wait for the situation to escalate. Call a professional plumber or gas leak detection service right away to ensure your home remains safe and secure.

By maintaining regular inspections and being aware of the signs of a gas leak, you can protect your property from potential harm. Don’t take chances with your family’s safety—act fast if you suspect a gas leak, and rely on trusted local experts to handle the situation.

Is Guttering Easy to Replace? A Guide for Melbourne Homeowners

0 Comments
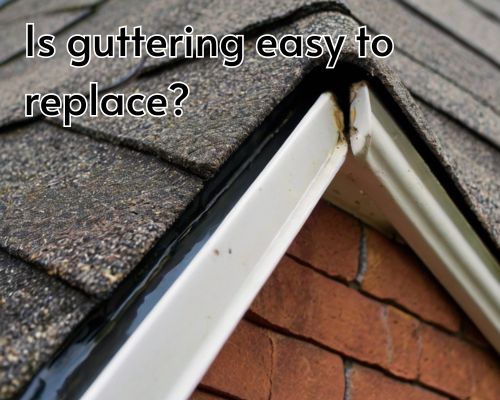
a gutter to be replaced and maintained

Is Guttering Easy to Replace? A Guide for Melbourne Homeowners

When it comes to maintaining your home, guttering plays a vital role in protecting your property from water damage. However, over time, gutters can deteriorate due to weather conditions, wear and tear, and improper maintenance. If you’re a homeowner in Melbourne, Australia, you might be wondering: “Is guttering easy to replace?” With Steve Arnie of Gutter Cleaning Melbourne, we will provide insight into the gutter replacement process, factors that affect the difficulty of replacement, and tips for Melbourne residents.

a gutter to be replaced and maintained

Why Is Guttering Important?

Guttering is essential for directing rainwater away from your roof, walls, and foundation. Without functional gutters, water can accumulate and cause damage to your home. This can lead to costly repairs such as cracked foundations, rotting wood, and mould growth. In Melbourne, where rainfall can be unpredictable, having a reliable gutter system is crucial to prevent water damage to your property.

When Should You Replace Your Guttering?

Before determining whether gutter replacement is easy, it’s important to understand when it’s necessary. Some common signs that your gutters may need replacing include:

  • Cracked or Leaking Gutters: Cracks in the gutter or leaks that can’t be sealed indicate that replacement may be necessary.
  • Sagging Gutters: If your gutters are no longer securely attached to the fascia, it can lead to poor drainage and water damage.
  • Rust and Corrosion: Metal gutters in Melbourne, particularly those exposed to saltwater, are prone to rust and corrosion. If the damage is severe, it may be time for a new system.
  • Clogging Issues: Constantly dealing with clogged gutters despite regular cleaning could signal that your gutters are past their prime and need replacement.

Is Guttering Easy to Replace?

The difficulty of replacing gutters can vary depending on several factors, including the type of gutter, the height of your home, and the condition of the current system. While it’s possible for DIY enthusiasts to replace gutters, there are certain challenges that may make the job more complex than it seems.

1. Type of Gutter System

There are different types of gutter systems, and each comes with its own set of replacement challenges. The most common types of gutters in Melbourne include:

  • Half-Round Gutters: These are often found on older homes. While they provide effective water flow, replacing them can be tricky because they require special fittings and may need to be custom-made for your home.
  • K-Style Gutters: These are the most popular type in modern Australian homes due to their aesthetic appeal and durability. They are easier to replace than half-round gutters, but still require precise measurements and installation.
  • Box Gutters: Typically found on commercial properties or flat-roofed homes, box gutters can be challenging to replace due to their size and the need for professional installation.

2. Height and Accessibility

Melbourne homes vary in height and architecture. If your gutters are on a single-story house, replacing them may be straightforward, and you may even be able to tackle the project as a DIY. However, if you live in a multi-story home or have high, hard-to-reach gutters, it’s best to leave the job to professionals. Working at height presents safety risks, and installing gutters without the proper tools can lead to errors that compromise the gutter’s effectiveness.

3. Tools and Materials

Replacing gutters involves more than just removing the old ones and attaching new ones. You’ll need to ensure that the new gutter system is properly aligned to avoid future water damage. Common tools needed include a ladder, drill, brackets, and sealant. For Melbourne homeowners opting for DIY, it’s important to have access to the right tools and equipment for the job.

4. Condition of the Fascia and Roof

In some cases, the fascia (the board that holds the gutters in place) may also need repair or replacement. If the fascia is rotting or damaged, the new guttering system won’t function properly. Additionally, the roof may need minor adjustments to ensure the new gutter system is installed correctly.

5. Local Melbourne Considerations

Melbourne’s weather can significantly impact the lifespan of your gutters. With hot summers and heavy rains in winter, it’s important to choose a gutter material that can withstand these conditions. Aluminium and Colorbond steel are two common materials for Melbourne guttering, as they are both durable and resistant to corrosion.

How to Replace Guttering in Melbourne

If you’re determined to replace your gutters on your own, here’s a step-by-step guide. However, always remember that hiring a professional can save you time and ensure the job is done safely and correctly.

Step 1: Assess the Situation

Inspect your gutters to determine the extent of the damage. If you’re unsure, contact a professional to evaluate the condition of your system. A professional can also advise you on the best type of gutter for your home, based on Melbourne’s climate.

Step 2: Remove the Old Guttering

Using a ladder, carefully remove the old gutters, brackets, and downpipes. Take extra care when working at height to ensure your safety. Dispose of the old guttering properly, following local waste disposal guidelines.

Step 3: Measure and Cut the New Gutters

Measure the length of your roofline to ensure you purchase the correct amount of new guttering. Cutting gutters to the correct length is essential for proper water flow. If you’re replacing downpipes, measure those as well to ensure they fit the new gutter system.

Step 4: Install the New Guttering

Install the new gutter system by securing the brackets and positioning the guttering along the fascia. Ensure that the gutters slope slightly towards the downpipes to allow for proper water drainage. This step is crucial for preventing water overflow and damage.

Step 5: Test the New System

Once the new gutters are in place, test the system by running water through them. Check for leaks, proper drainage, and secure connections. If necessary, make adjustments to ensure everything is functioning properly.

Should You Hire a Professional?

While DIY gutter replacement is possible, it’s often best to hire a professional. Here are some reasons why:

  • Expertise and Experience: A professional roofer or gutter installer in Melbourne has the experience and knowledge to replace your gutters correctly. They can quickly identify and address potential issues, such as fascia damage or incorrect alignment.
  • Safety: Working on a ladder can be dangerous, especially when dealing with high gutters. Professionals have the necessary safety equipment and training to work at height safely.
  • Long-Term Solution: When you hire a professional especially Steve Arnie of Gutter Cleaning Melbourne, you’re more likely to get a long-lasting, effective gutter system. Professionals use high-quality materials and ensure proper installation, minimizing the need for future repairs.

Conclusion

So, is guttering easy to replace in Melbourne? It depends. While the process can be manageable for those with experience, it’s often best to leave it to the professionals, especially if you’re dealing with complex gutter systems or working at height. Whether you choose to tackle the project yourself or hire a specialist, ensure that your new gutter system is durable enough to handle Melbourne’s variable weather. Proper maintenance and timely replacement will protect your home from water damage and keep your property safe for years to come.

For Melbourne homeowners looking to replace their gutters, it’s crucial to consider local weather conditions and choose the right materials. Professional gutter replacement services in Melbourne can ensure the job is done efficiently and safely, giving you peace of mind knowing your home is well-protected from the elements.